Nodebuster Ultimate Beginners Guide and Walkthrough
Nodebuster Beginners Guide will help new players to get a better progression, explain the game mechanics and allow to farm different resources faster.
Game Basics[edit source]
The main idea of the game that you will need to survive the Breach long enough to fight a boss and destroy it.
You need to hover the cursor around the screen to damage the enemy virus squares. Attacks are automatic on the set time interval. When you attack the enemy node, it strikes back damaging you.
If you destroy the node, it will drop resources. Enemy health and damage increases over time, making killing them harder. You need to collect them by hovering the mouse over them otherwise they will disappear when the round ends. Round ends if your health falls to 0, if you defeat the boss or terminate the run.
Once you defeat the boss you can do another run on higher prestige difficulty with tougher enemies and higher rewards. Your goal is to push through the prestiges, as it increases the loot and unlocks additional enemies.
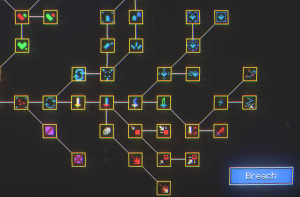
In the Upgrade Tree you buy various upgrades using bits, nodes, cores, sp and netcoin currencies. At the start you have only Bits currency that is being dropped by the normal red enemies. Some upgrade nodes unlock when you invest 1 point into the prerequisite nodes, but for some you will need to max the current node.
Walkthrough[edit source]
At first you will need to do a few quick runs, get some Bits from the red enemies and buy some basic upgrades in the tech tree in the main screen. As you get stronger you will be able to survive long enough during the run to face your first Boss. Most likely you will be defeated by it and will need to do a couple more runs to be able to defeat it.
Once Boss is defeated you will be able to select a prestige difficulty for the run. I'd recommend to do a couple more of prestige 0 runs to get more bits and get more upgrades. Focus on improving your damage and health until you can easily take out red enemies and then invest as much as you can in the spawn rate upgrades to increase farming speed.
For the Prestige progression feel free to try the new prestige difficulty when it's available, if you fail to defeat the boss or get to it, dial back to the previous prestige and do 1-2 farming runs. Rinse and repeat.
As for the tech tree you can invest into anything you see useful, Nodebuster is pretty flexible with it and allows to spread the resources without significant penalties to the progression. If you want faster growth I would recommend following upgrade priorities:
- Getting enough Damage, Health and Armor to survive for ~60 seconds
- Spawn Rate
- Attack Size
- Blue Spawn Rate
- % Armor and Damage for # of enemies in the area
At some point you will max out the basic upgrade nodes and will unlock more powerful upgrades that will give you +2 Armor and +12 Max Health. Get those and you will be able to last longer in the round. For extra damage you will need to take +20% Attack speed on the right, it will unlock additional Damage upgrades. All those upgrades will significantly improve your progression and farming speed.
Blue Nodes are hard to get and will be most rare currency until the end of the game, so use them wisely. It's best to use them for Damage upgrades first, as it increases farming speed, following by survivability upgrades and then auto pulser drones.
Prestiges and bosses will not cause any significant issues at this point. Most likely you will need to do 1 farming run after unlocking the next prestige level to get strong enough to defeat the boss.
If you feel that normal are easily defeated, but bosses are taking you out invest into Boss damage and Armor nodes.
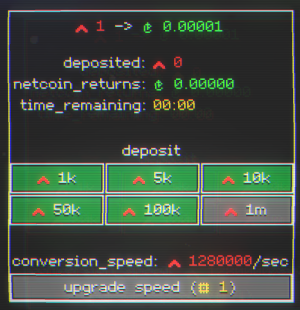
As you will keep maxing the upgrades you will encounter new powerful upgrades that will require Netcoin. It can be obtained by converting Bits in the Crypto Mine that is unlocked on the left side of the tech tree after Attack Size Upgrades.
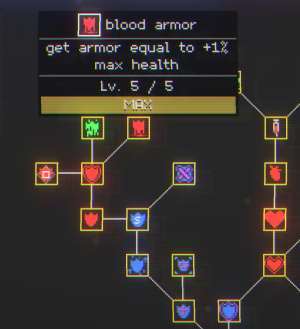
Once you reach upgrades that gives % of your health as a bonuses to Armor, Health Regen or Damage things will start to speed up drastically. At this point you become way stronger and will be able to plow through prestiges easily. Make sure to max them out along with the normal upgrades for Damage, Armor and Health that you get along the way. Afterwards, you can aim for additional Auto Pulser Drones and their upgrades, since they add a lot to the damage and make things easier.
Rest of the game is pretty straightforward, invest into upgrades you can get, getting upgrades that increase your health per kill permanently will help a lot as well.
Here are additional Tips for the mid-late Nodebuster game:
- Pulse bolts seem to be pretty useless all the way until you get their last node that will add bit explosion chance.
- Most basic stats are useful later on, but Health > Armor > Damage if you can properly kill normal enemies.
- Once all the Damage upgrades are done and you need more damage focus on Critical Chance and Damage. You can increase Crit chance to 100%, meaning all crit damage is a guaranteed damage increase.
- Do not turn all your Bits into Netcoins straight away, you might need them for other upgrades.
- Processors are only used to Upgrade Speed in Crypto Mine, so feel free to use them all there.
As you push through the prestiges and unlock additional nodes you will eventually hit the final nodes, that do not have follow ups once maxed out. If you follow the Health upgrade path you will encounter some cryptic upgrades that require Cores from the bosses. Do not worry, you can take them and follow it's cryptic path all the way to final unlocks.
As you farm Bits and Netcoins for the Godvirus Research Lab you will have to either grind Prestige 25 multiple times, because the boss will reset it or focus on the Prestige 24 for longer runs for more idle farming. Get all the required Netcoins for the lab and see what happens next.
Check out Game Vault Game Guides for info on other games.

